Construction Site Dust Control: 7 Tips For Cleaner Air
Controlling dust on a construction site is crucial to completing the project on time and mitigating injury risks. Dust is kicked up in disruptive amounts by vehicle and foot traffic during a construction project. This dust pollutes the air and limits visibility for the workers, so you need to have a plan in place to combat dust.
7 Tips for Construction Site Dust Control
There are many different solutions that construction workers implement to try and control dust during a project, so in case you need some ideas, here are some good tips:
1. Water
Spraying water is the most common way that workers deal with dust during a project. By having a water tank on hand that can be used to keep the dust wet and prevent it from rising into the air, workers can mitigate dust at a relatively cheap cost. The downside to this method is that you have to keep spraying the dust when it dries out, which is a time-consuming effort that takes away from your project completion time.
2. Chemicals
There are also certain chemicals you can add to water before you use it for construction site dust control. These chemicals are designed to help bind the dust together and make it even less likely to be kicked up into the air.
These types of chemicals are called palliatives and can potentially pollute nearby groundwater. You also have tackifiers and polymers which both work to modify the soil surface so that it reduces dust by anywhere from 70-80%.
3. Tillage
Tillage is using a plow to roughen up the surface of a dirt area. This method is surprisingly effective at reducing construction site dust, and is capable of a 90% dust reduction. Tillage is rather labor-intensive, though.
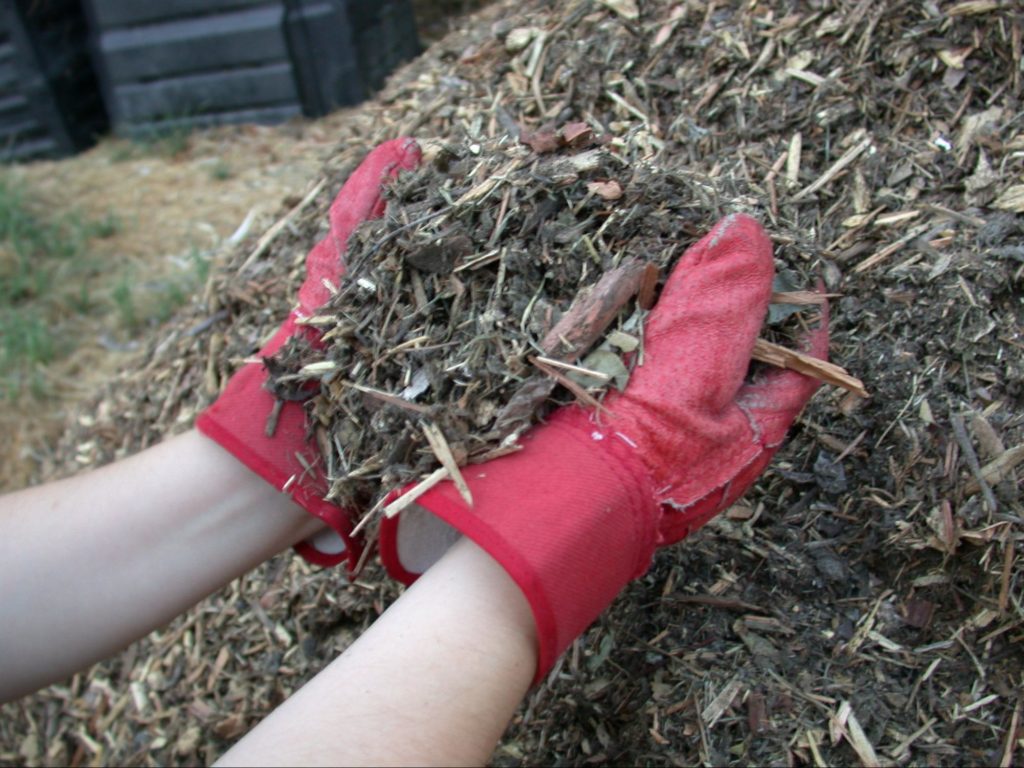
4. Mulch
By adding mulch and vegetation to a dirt surface, you can drastically reduce the amount of dust kicked up. This method is cheap, quick, and effective. The mulch must be removed after project completion, however.
5. Barriers
Many workers will move some barriers around the project site in order to block wind from entering. Fences specially designed to block wind, tree lines, and rows of perennial grass all work well at blocking wind.
6. Sweeping
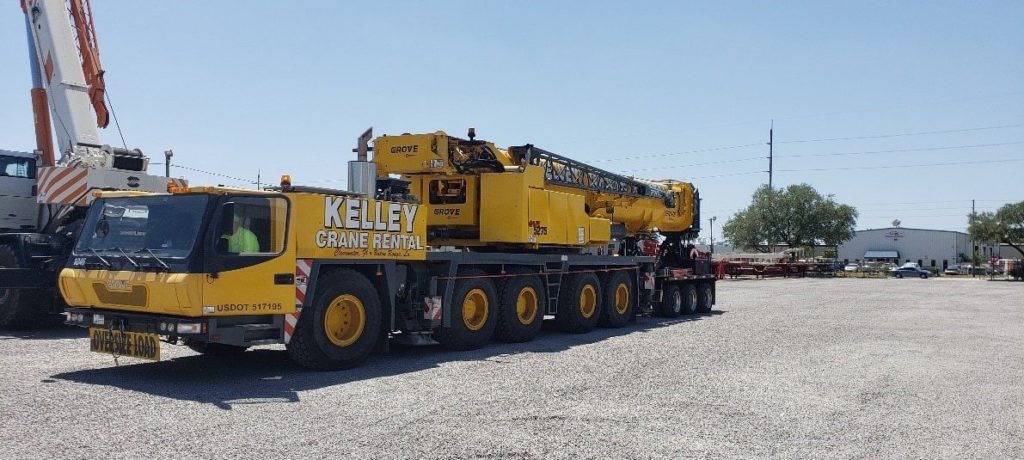
You can also try to sweep the dust away with large brooms and highway sweeping equipment. This is usually used as a last resort dust control method because of the time and effort it takes. It also releases a lot of dust into the air which is counterintuitive to what you’re trying to achieve with dust control in the first place.
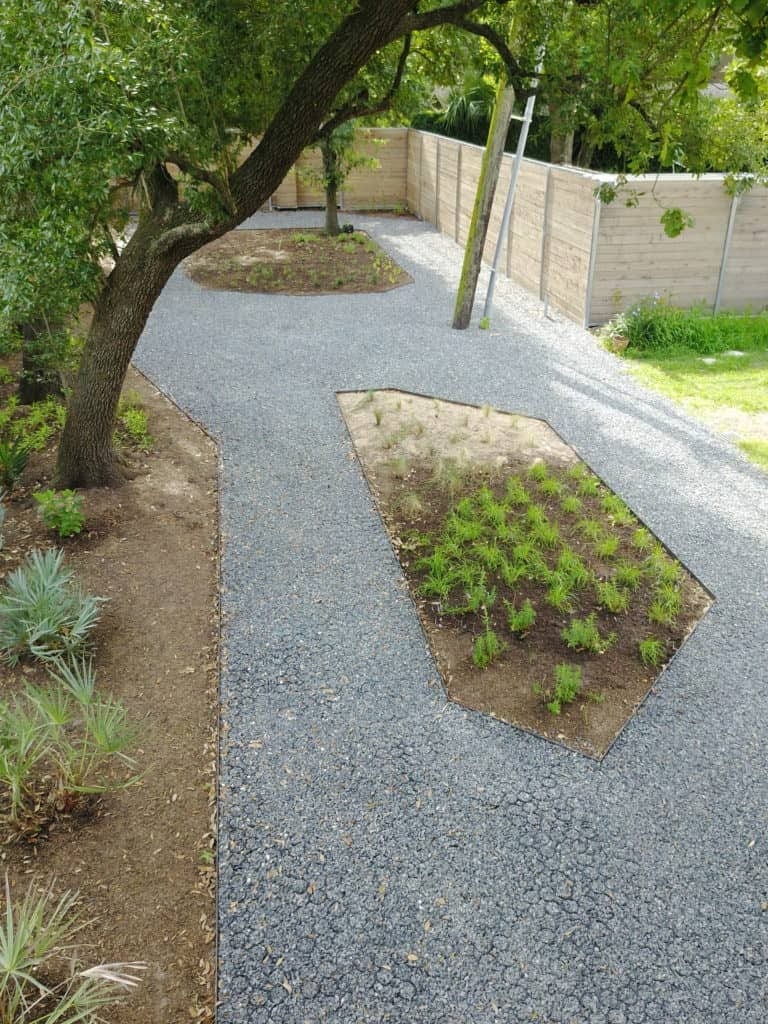
7. Gravel
If you aren’t able to secure any vegetation or mulch for your construction site, try gravel instead. Pouring loose gravel over a dirt surface is highly effective at preventing dust from being kicked up. Larger stones generally work better for this purpose.
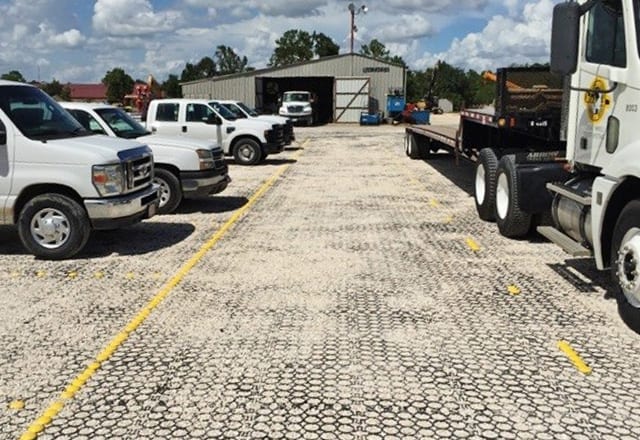
You could also go the extra mile and install permeable pavers for a permanent dust control solution. TRUEGRID PRO LITE and/or TRUEGRID PRO PLUS pavers are the perfect choice for any construction site. Their durability and dust-suppression capabilities are highly regarded as being the solution for construction projects of any scale.
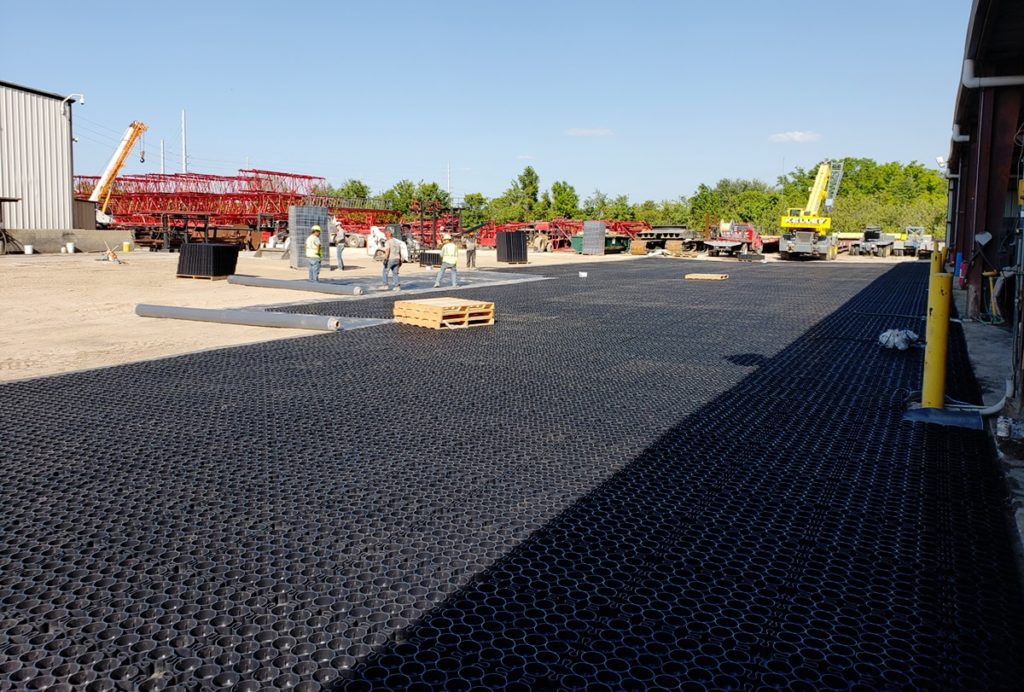
By installing the pavers before you begin construction, you can eliminate dust from the ground up. You can install them in less than a day in most cases, and they disassemble just as fast after project completion.
TRUEGRID Pavers Eliminate Dust Completely
The easiest way to eliminate dust from a construction project is to remove the entire layer of dirt you’re going to be working on and replace it with gravel-filled permeable pavers. You can transform the area around your project into a 100%-permeable, dust-free zone that improves safety and productivity, and put it all back the way you found it less than a day after project completion.
TRUEGRID pavers are durable enough to handle the weight of a monster truck jumping off a ramp and landing on them without breaking, and that’s before their empty cells have been filled with gravel. This makes them the most durable and reliable choice for construction projects of all shapes and sizes.
They are made from 100%-recycled plastic and have no adverse effect on the environment, as opposed to palliatives and polymers. When looking for dust control at a construction site, TRUEGRID permeable pavers are a set-it-and-forget-it option.
You simply install them before beginning the work and take them out when you’re done. They can even get left in place in many instances where the value they provide as a parking lot and drainage material is too valuable to replace.
TRUEGRID is Transforming Construction Site Dust Control
Mitigating dust on a construction site is important if you want to maximize productivity and keep safety concerns to a minimum. To do this, you could choose a temporary dust control option like water or chemicals, or you could choose a permanent option like TRUEGRID permeable pavers.
If you want a durable, set-it-and-forget-it solution to dust control at a construction site, call TRUEGRID today and get in touch with a pavement professional.
Including some garden areas in your patio is a great way to change up the aesthetic and keep fresh fruit and/or veggies on hand. It will make your patio design unique and can help add some natural greenery to the surrounding landscape.
When it comes to implementing garden areas, though, there are a few materials you should consider for paving. These materials each have their pros and cons, so in case you’re in need of garden paving options, let’s go over a few of the best:
Concrete Pavers
Concrete is one of the most common materials used in garden patios. Poured concrete is the most popular choice, but many opt for concrete slabs or concrete pavers as well. Concrete has a variety of style options, since it can be colored or imprinted with graphics and designs. It can also be stamped to look like other materials, such as granite.
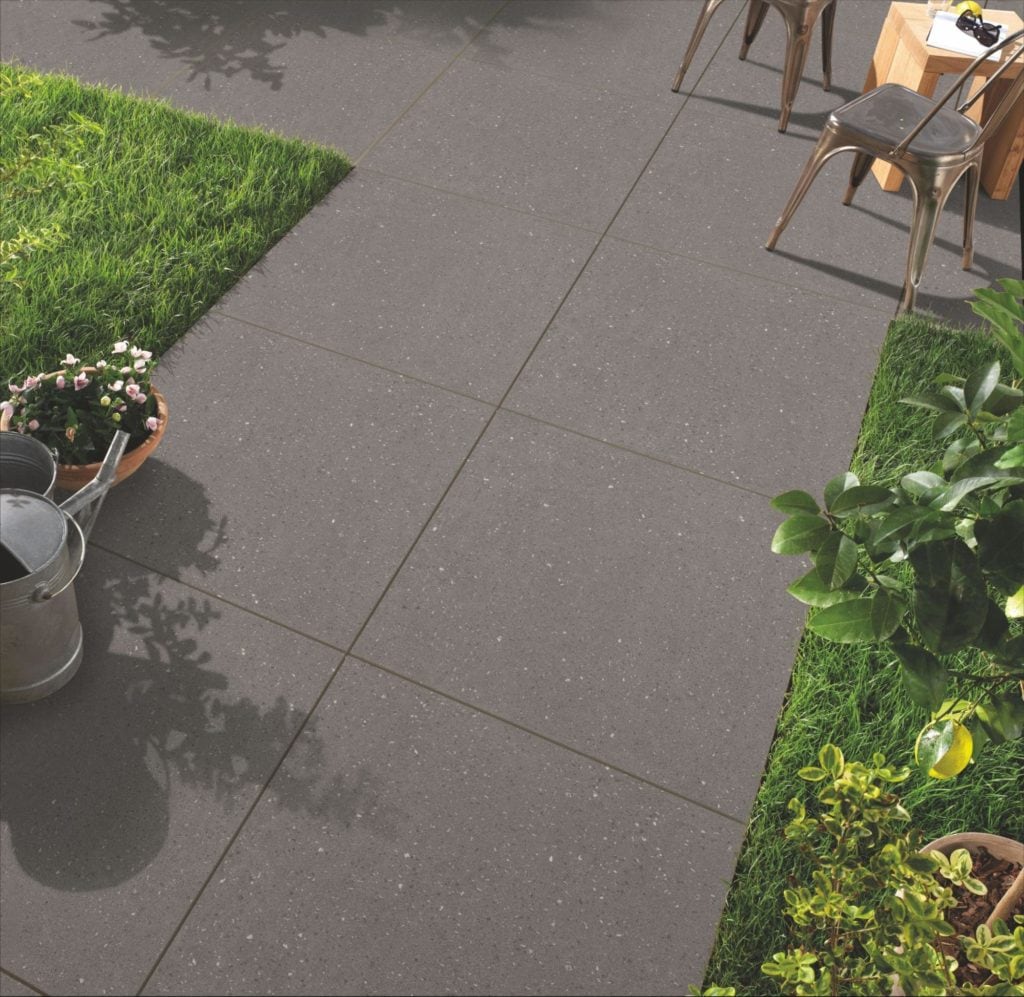
As far as maintenance goes, concrete needs to be periodically resealed and resurfaced. Resealing should be done every 5 years and resurfacing every 10. Concrete can be vulnerable to cracking in freeze/thaw cycles and does not hold up well in extreme cold. The installation process for concrete is usually very lengthy and can take many days, which adds to the cost of labor.
Brick
Brick is another popular option for garden paving. Brick has a unique look that some homeowners gravitate towards. It gives off an earthy, natural vibe that tends to pair well with adornments like garden plants. Brick can take longer than most materials to install because each brick has to be done individually. Brick needs to be resealed and resurfaced often to prevent moisture intrusion.
Brick is not known for being very durable. It chips and deteriorates easily. As far as cost goes, it’s one of the more expensive types of garden paving ideas, but many are willing to pay for the unique aesthetic that only brick can provide.
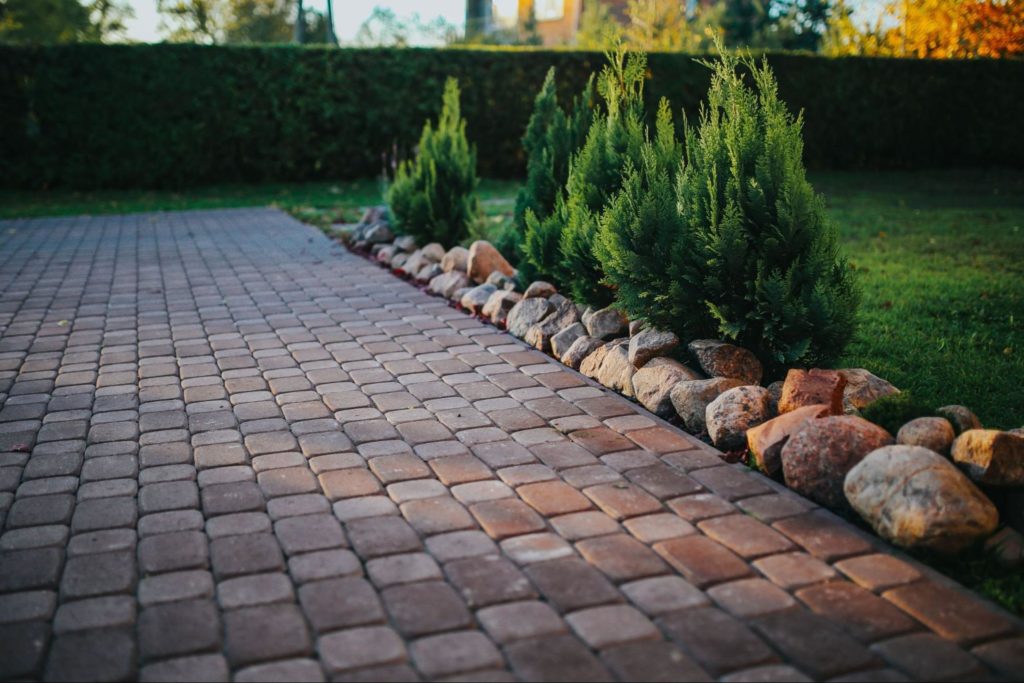
Natural Stones
Natural stones like granite, flagstone, limestone, sandstone, and bluestone make an excellent choice for a garden. These materials are more expensive than concrete or brick but they have a look that’s hard to mimic. They can be installed in slab form but are not found in paver form, often because of their fragility when cut too thin.
Natural stones need regular resealing just like most other impermeable materials. They can also be vulnerable to temperature extremes and will eventually wear down over time under foot traffic and weather conditions.
Permeable Pavement
If you want the best garden paving design possible, permeable pavement is likely going to be the solution. Other types of materials are often installed without permeability as a concern which can lead to bigger problems down the road.
Concrete slabs and patios without permeability end up with moisture that sits on the surface. Eventually, this moisture can work its way into the surface and do damage. Garden plants usually need a lot of water, so having permeable materials around your garden is an environmentally-friendly way to extend the lifespan of your pavement and reduce drainage concerns as well.
TRUEGRID permeable pavers, for instance, will last up to 60 years with almost no maintenance. They never need to be resealed or resurfaced, and only require vacuuming and/or a spray down every now and then. Permeable pavers make paving a garden DIY a quick and easy project, with installation able to be completed in as little as one day.
TRUEGRID PRO LITE and TRUEGRID PRO PLUS both have 98%-permeability, meaning they can drain the water from your garden, as well as stormwater with ease. Installing TRUEGRID permeable pavers for your garden patio also means it will be safer. Without any standing water around to make things slippery, you should be able to enjoy a dryer patio overall, making slips and falls less likely.
The installation of a TRUEGRID permeable patio is incredibly simple. The entire process is often able to be completed in hours and requires little heavy equipment. First, the area must be excavated to a depth of about 12 inches before a piece of fabric is laid at the bottom of the excavated pit.
Then, the pit is filled with gravel and compacted until level. Next, the interlocking pavers are snapped together as easily as LEGO blocks, with more gravel being poured over them and compacted into the pavers with a vehicle or heavy roller. This weighs the pavers down and prevents them from moving, which completes the installation process.
Garden Patios Require a Special Paving Solution
Garden patio paving needs to have certain qualities if you want it to last long. If you want the most durable, permeable, eco-friendly, stylish, and long-lasting garden pavement on the planet, get in touch with TRUEGRID today for a free quote.
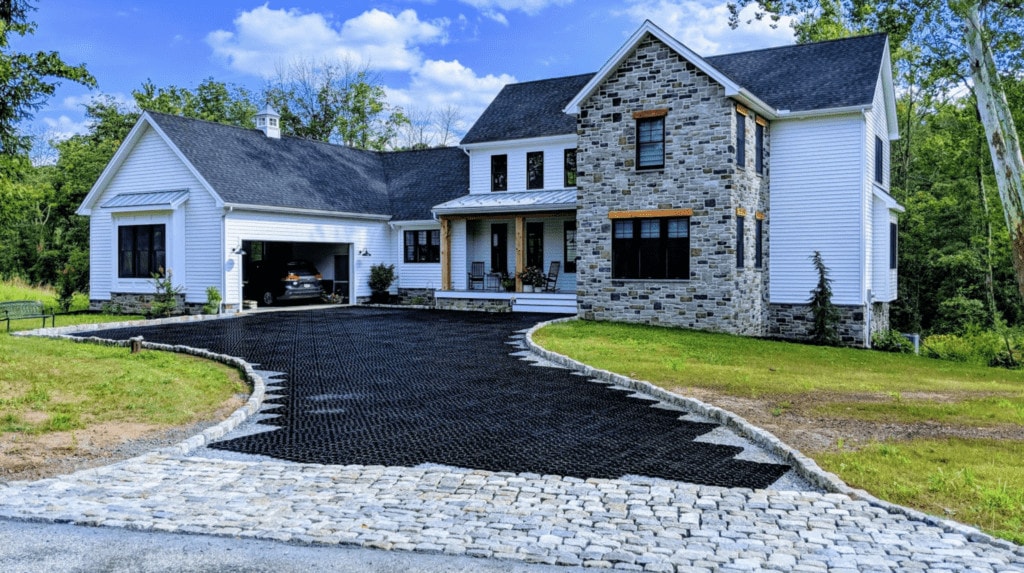
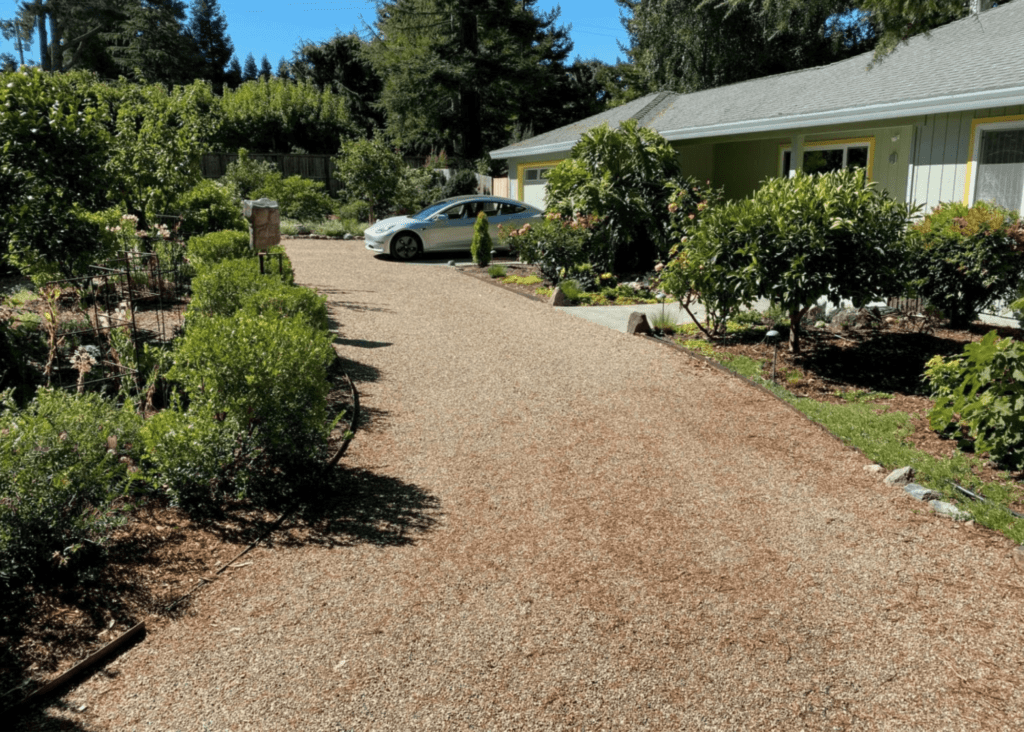
Gravel driveways are great for many reasons. Not only are they one of the least expensive types of driveways, they can also look stylish and provide much-needed permeability for your parking area.
However, especially with unstabilized gravel, these driveways can easily spread and begin to rut as the gravel migrates out of the parking area. This is why you need gravel driveway edging if you want to keep your gravel in place.
Gravel driveway edging serves as a way to help keep gravel in place and can even help boost curb appeal in some cases. However, not all methods of keeping gravel in place have the same benefits, so in case you’re in need of new driveway edging for your gravel, here are some ideas for you to consider:
Types of Driveway Edging for Gravel
DIY driveway edging ideas are some of the easiest to implement and can save you a ton of time, energy, and money. They prevent you from having to keep raking gravel back into place or buying more gravel to replace the stuff that’s spread out. There are two main types of driveway edging, flat and raised.
1. Flat Edging
Flat edging sits level with the rest of the driveway surface and is usually installed during the initial driveway installation. Flat edging can also be added after the fact by excavating the border of your driveway, laying down a sub-base of sand or rock, and installing the edging material as needed.

Flat edging usually takes the form of flat, concrete blocks. You can get creative with your flat driveway edging ideas, though, and choose colored or imprinted stone pavers for a unique color scheme. Flat edging can help with mitigating the spread of gravel a bit, but it’s mostly useful in that it provides an opportunity to implement a new aesthetic into your driveway. It also prevents driveway erosion from occurring along the sides of your gravel border.
2. Raised Edging
The other main type of driveway edging is known as raised edging. This edging sits above the regular driveway surface, acting as a true barrier that prevents gravel from spilling out. It’s much more effective than flat edging at preventing gravel migration and can take many different forms.
Concrete blocks and natural stone pavers are a couple of types of raised driveway edging ideas that many homeowners prefer. You could also use shrubs, flowers, wooden planks or posts, logs, or bricks as a raised border for your gravel driveway.
An Alternative to Gravel Edging
3. Permeable Pavers
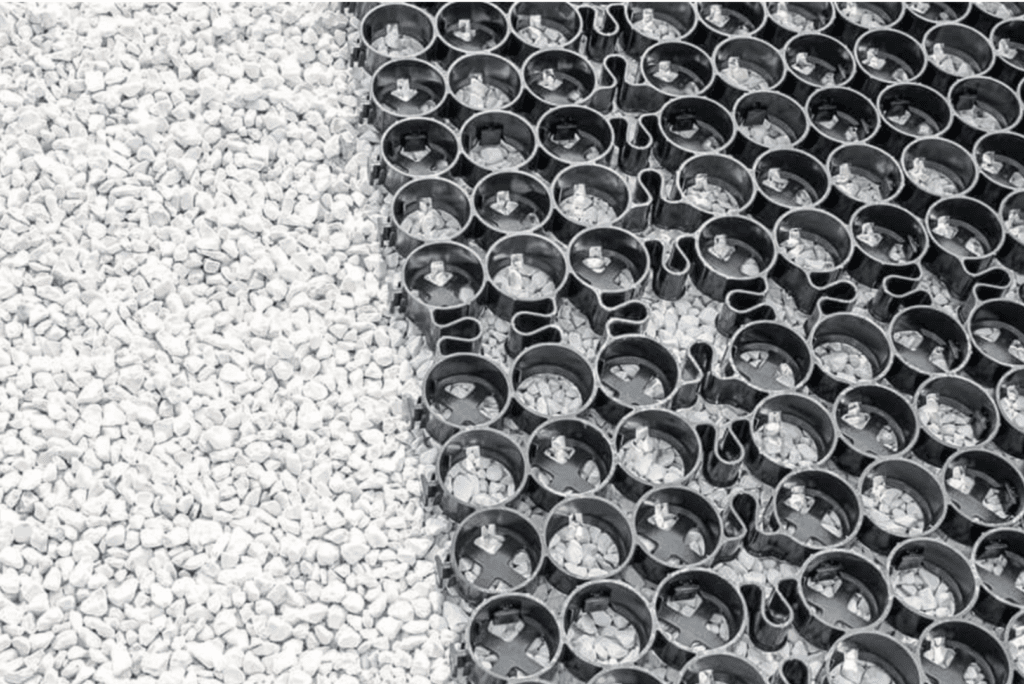
When it comes to gravel driveway edging ideas, one that most people don’t think of is permeable pavement. TRUEGRID PRO LITE and TRUEGRID PRO PLUS pavers, for instance, are the perfect material for keeping your gravel firmly locked in place. TRUEGRID pavers eliminate the need for driveway edging completely because they lock gravel into their empty cells which weighs down the pavers and prevents gravel from spreading around or migrating.
Many homeowners and gravel pavement owners are switching to TRUEGRID which offers to stabilize their gravel from day one, as opposed to installing loose gravel and using edging to try and prevent it from spreading. A TRUEGRID gravel driveway installation can be completed as quickly as a loose gravel driveway, with the entire process taking less than a day in most cases.
One of the main benefits that this type of gravel driveway has over loose gravel with edging is the lack of maintenance requirements. With flat edging, you’ll still have to rake in and/or replace a certain amount of gravel that manages to spill over the sides.
The edging itself can deteriorate as well. Concrete blocks and similar materials are prone to chipping and cracking, especially in freeze/thaw cycles. These materials need to be resealed every 5 years or so to keep them in top shape.
TRUEGRID permeable pavement, on the other hand, is better than most driveway edging ideas because it can last 60 years without needing almost any maintenance at all. These pavers are impervious to temperature extremes, insects, warping, UV-rays, and other types of damage that wood, stone, concrete, and vegetation are not.
Build the Perfect Gravel Driveway with TRUEGRID
If you want a gravel driveway that you won’t have to worry about maintaining very much, TRUEGRID pavers are the way to go. Instead of installing edging that’s ineffective and fragile, why not use a driveway material that naturally locks your gravel in place?
With a TRUEGRID permeable gravel driveway, you can stop searching through DIY gravel driveway ideas, and rest assured knowing that your gravel driveway will stay intact for up to 60 years.
If you want the most durable, eco-friendly, permeable, and low-maintenance gravel driveway solution on the planet, don’t hesitate to call TRUEGRID today and get in touch with a pavement professional.
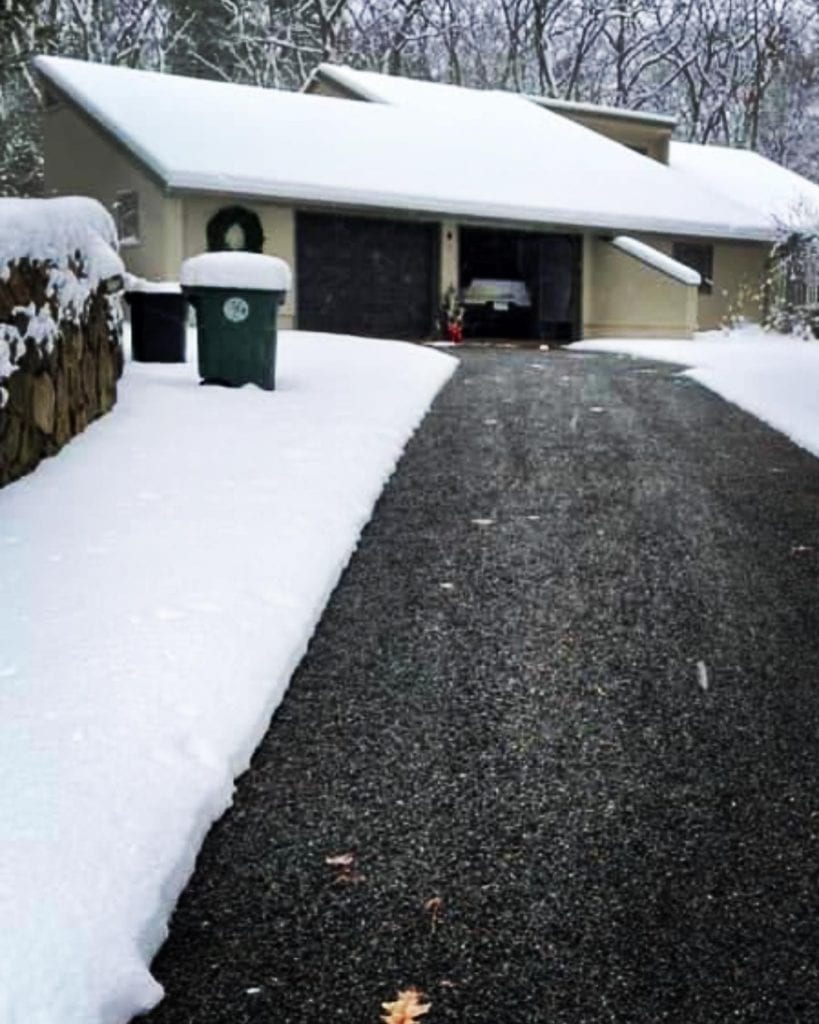
Ice and snow in your driveway can be a huge hassle during the winter months. Not only that, but they can pose a risk to your safety as well. Many people have taken a hard fall after slipping on some ice in their driveway, or suffered a heart attack while trying to shovel mounds of snow.
Even setting aside the health risks, having to shovel a lot of snow or use a snow blower just isn’t viable for some people. That’s where heated driveways come in. Heated driveways use different methods to heat the surface and melt snow and ice before they can build up.
Most heated driveways are built from concrete or asphalt, but you can, in fact, install a heated driveway made from permeable pavers. Permeable pavers might not seem like they’d work well with a heating system at first glance, but this couldn’t be further from the truth. In case you want a heated permeable driveway, let’s take a look at how to install and operate them.
Types of Heated Permeable Driveways
There are multiple types of driveway heating methods to choose for a heated permeable driveway. Electric heating methods utilize heating cables in the bedding layer of the driveway that are heated by electricity which heats the surface of the driveway pavers, thus melting the snow and ice on top of it. The cables must be connected to a power source, like the central power box of the home, for instance.
Another type of heated permeable driveway system is hydronic heating. Instead of electricity, this method uses heated water and antifreeze pumped through tubing beneath the driveway’s surface. The heated solution warms the tubes and melts the snow and ice on the surface of the driveway as a result.
Both of these heating methods work far better with permeable driveways than they do with impermeable ones. This is because the melted snow and ice simply drains right through these types of driveways because it has a natural outlet to escape through.
With solid concrete and asphalt driveways, the melted water tends to pool around the edges if you don’t have some type of additional drainage system installed along the sides of your driveway. For this reason, impermeable heated driveways tend to work best when sloped downwards, away from the home and into the street.
Both heating methods use sensors to detect the presence of precipitation and turn the heat on. If left on all the time, these sensors can add to your energy bill quite a bit, which is why many homeowners opt to manually turn the heating systems on when the weather calls for it.
Heated Paver Driveway Considerations
There are multiple things you want to consider before installing a heated permeable paver driveway. One of these is which heat source you prefer. Electric heating systems can last longer than the tubing in a hydronic system, but the cost can be higher.
If maintenance is a concern and you want a heating system that’s going to last for the long haul, we recommend using an electric heating system because of the regular maintenance that hydronic tubing requires.
How to Install a Permeable Driveway with Heat
Installing a permeable driveway with a heating system is just about as easy as installing one without. There’s just one extra step you have to take during the installation and it doesn’t typically take very long to complete.
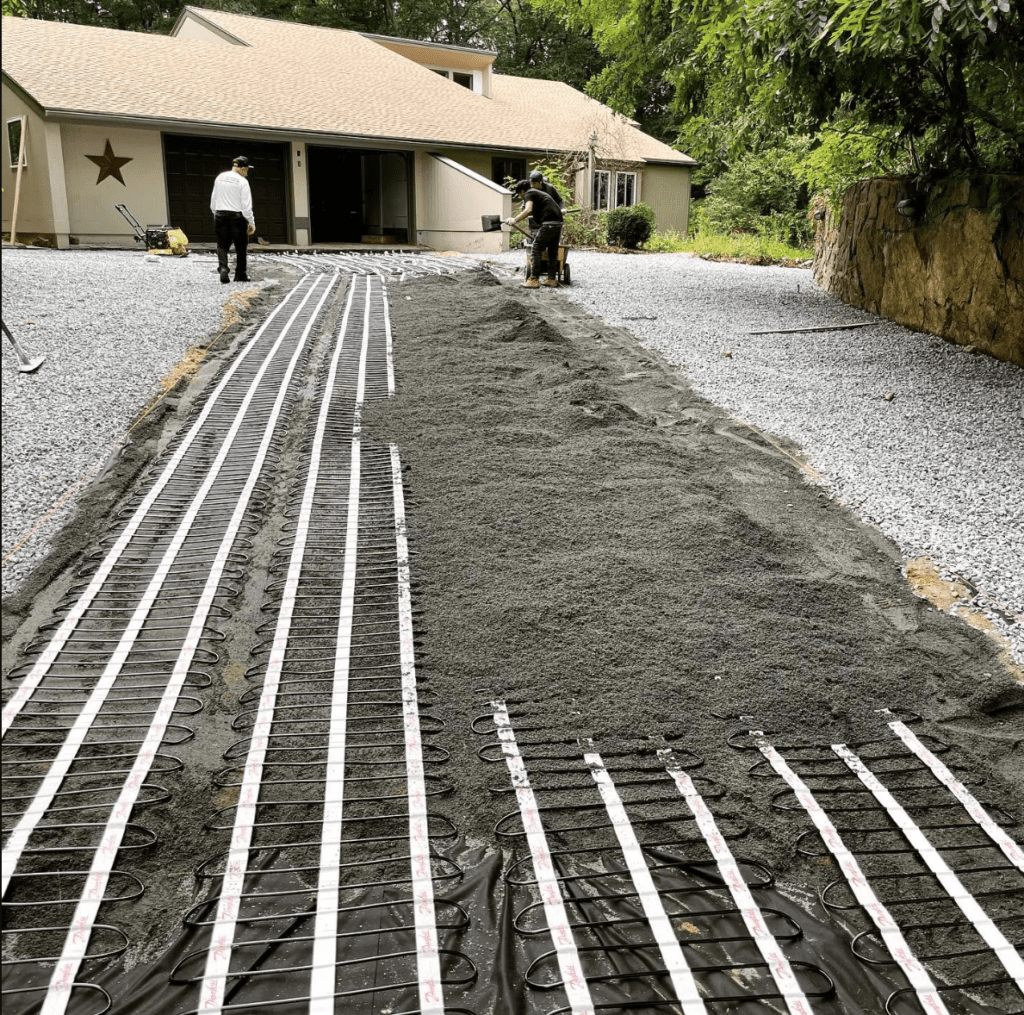
To start the installation of a heated permeable paver driveway, the area must be excavated to a depth of about 8 inches. After, a piece of fabric will be laid at the bottom of the cross section to provide separation and optimal drainage. Next, the base aggregate will be laid with washed angular stone and compacted to leave room for a layer of sand to level out the top.
The heating system will be placed in the sand and connected to its fuel source. Then, the interlocking pavers such as TRUEGRID PRO LITE or TRUEGRID PRO PLUS will be snapped into place over the top of the sand as easily as you would with LEGO blocks.
Once this is complete, more gravel will be poured into the cells of the empty pavers and compacted into them with a vehicle or heavy roller. Once the surface gravel has been compacted into the pavers this completes the installation of your new heated permeable paver driveway.
![]()
TRUEGRID Makes the Best Permeable Pavers for Heated Driveways
When it comes to choosing the pavers for your new heated driveway, you can’t go wrong with TRUEGRID. Not only do these pavers have a lifespan of up to 60 years DUE to their durable composition, they’re made from 100%-recycled plastic. Impervious to almost all deteriorating factors, TRUEGRID permeable pavers require almost zero maintenance throughout their lifetime.
If you want to build the most eco-friendly, highest quality, durable, stylish, and low-maintenance heated driveway, don’t hesitate to pick up the phone and call TRUEGRID today for a free quote.