Some of us are homeowners and despite having the luxury of owning a house, we have a whole other realm of chores around the house that helps maintain and preserve our homes. Maintaining and renovating our homes is an investment into not only a piece of property but to our ideal “home sweet home”. Therefore, behind the glamour of being a successful homeowner, keeping your place looking its best takes some weed pulling, dust wiping, and grime scrubbing. Basically, you have to got to put in some work.
For homeowners, building a new house or renovating an old one gives them a deeper satisfaction and freedom that many can’t enjoy at an apartment or loft. You have the choice to customize and mold your home into the place you are happy to live in every day. The best part about today is that there is the added perk of taking advantage of new market trends that bring innovation and easy-living to your doorstep. Being said, the first thing anyone is going to see at your new home is your front yard. Gardens, walkways, and driveways bring aesthetics to your house including functionality and accessibility. Planning and designing your front yard, entrance and driveway is important for many reasons. You want your home to be inviting for guests, enjoyable for your children and your dog, who thoroughly love tearing through your yard and accessible for parking and any foot traffic.
Before you start installing anything, you need to consider these four things: Your driveway’s goal is to give you access to your front door, parking area, and garage. Having a walkway that connects from your driveway to your front door is useful when you need to carry things into your home. Plus, you don’t want to walk in grass in case of weather conditions or the kind of shoes you’re wearing that day. Proper drainage affects the longevity and quality of your driveway for many reasons. Wet ground and water runoff can erode and weaken the foundation allowing your driveway to deteriorate at a faster rate. You need to accentuate your home with your driveway since that’s the “red carpet” that leads to what lays behind your front door.
Ask yourself what it is you want and/or need from your home, such as:
- What is your budget?
- What are your project dimensions?
- What is the amount of time you have to set aside to do the project?
- Does your street access allow for a good view of oncoming traffic?
- How much accessibility would you prefer and to what areas of your property?
- Are you looking to add plants, flowers, and shrubs for aesthetic purposes? Maybe a garden?
- Does your area experience frequent or heavy flooding?
- Or does your area experience droughts often?
- Are you willing to put in some maintenance work or would you rather lay down a driveway you can just forget about?
DIY Gravel Driveway
Pros: The easiest, fastest and cheapest do it yourself driveway is commonly made with gravel. You basically buy it, dump it and spread it evenly to create a flat surface for any vehicle to go over. The perks about gravel is the customization due to the color selection, shapes and sizes and its permeability that allows water to soak back into the ground. Oil leaks can be easily covered and it has more friction than asphalt which tends to be slicker.
Cons: There is an ongoing maintenance required for this type of driveway and it’s not the best option for snowy regions. Gravel migrates easily and creates a lot of dust whenever traffic goes over it.
DIY Concrete Driveway
Pros: The traditional material for driveway, concrete is great for a clean style for your home and can last up to 30 years.
Cons: Cost of material and installation for concrete is more expensive than asphalt. Weather and rising temperature changes causes cement to expand and contract, which creates cracks if not installed properly. When pouring concrete there is a lot to consider such as humidity levels, weather conditions and the length of time cement needs to undergo its chemical process to solidify, which can take up to a couple of weeks. There is also the environmental impact of adding more impermeable surfaces that exuberate flooding and water contamination.
DIY Permeable Paver Driveway
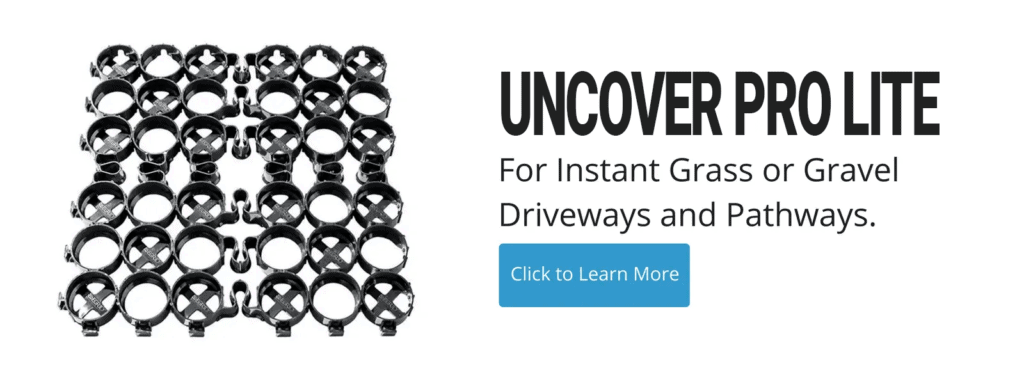
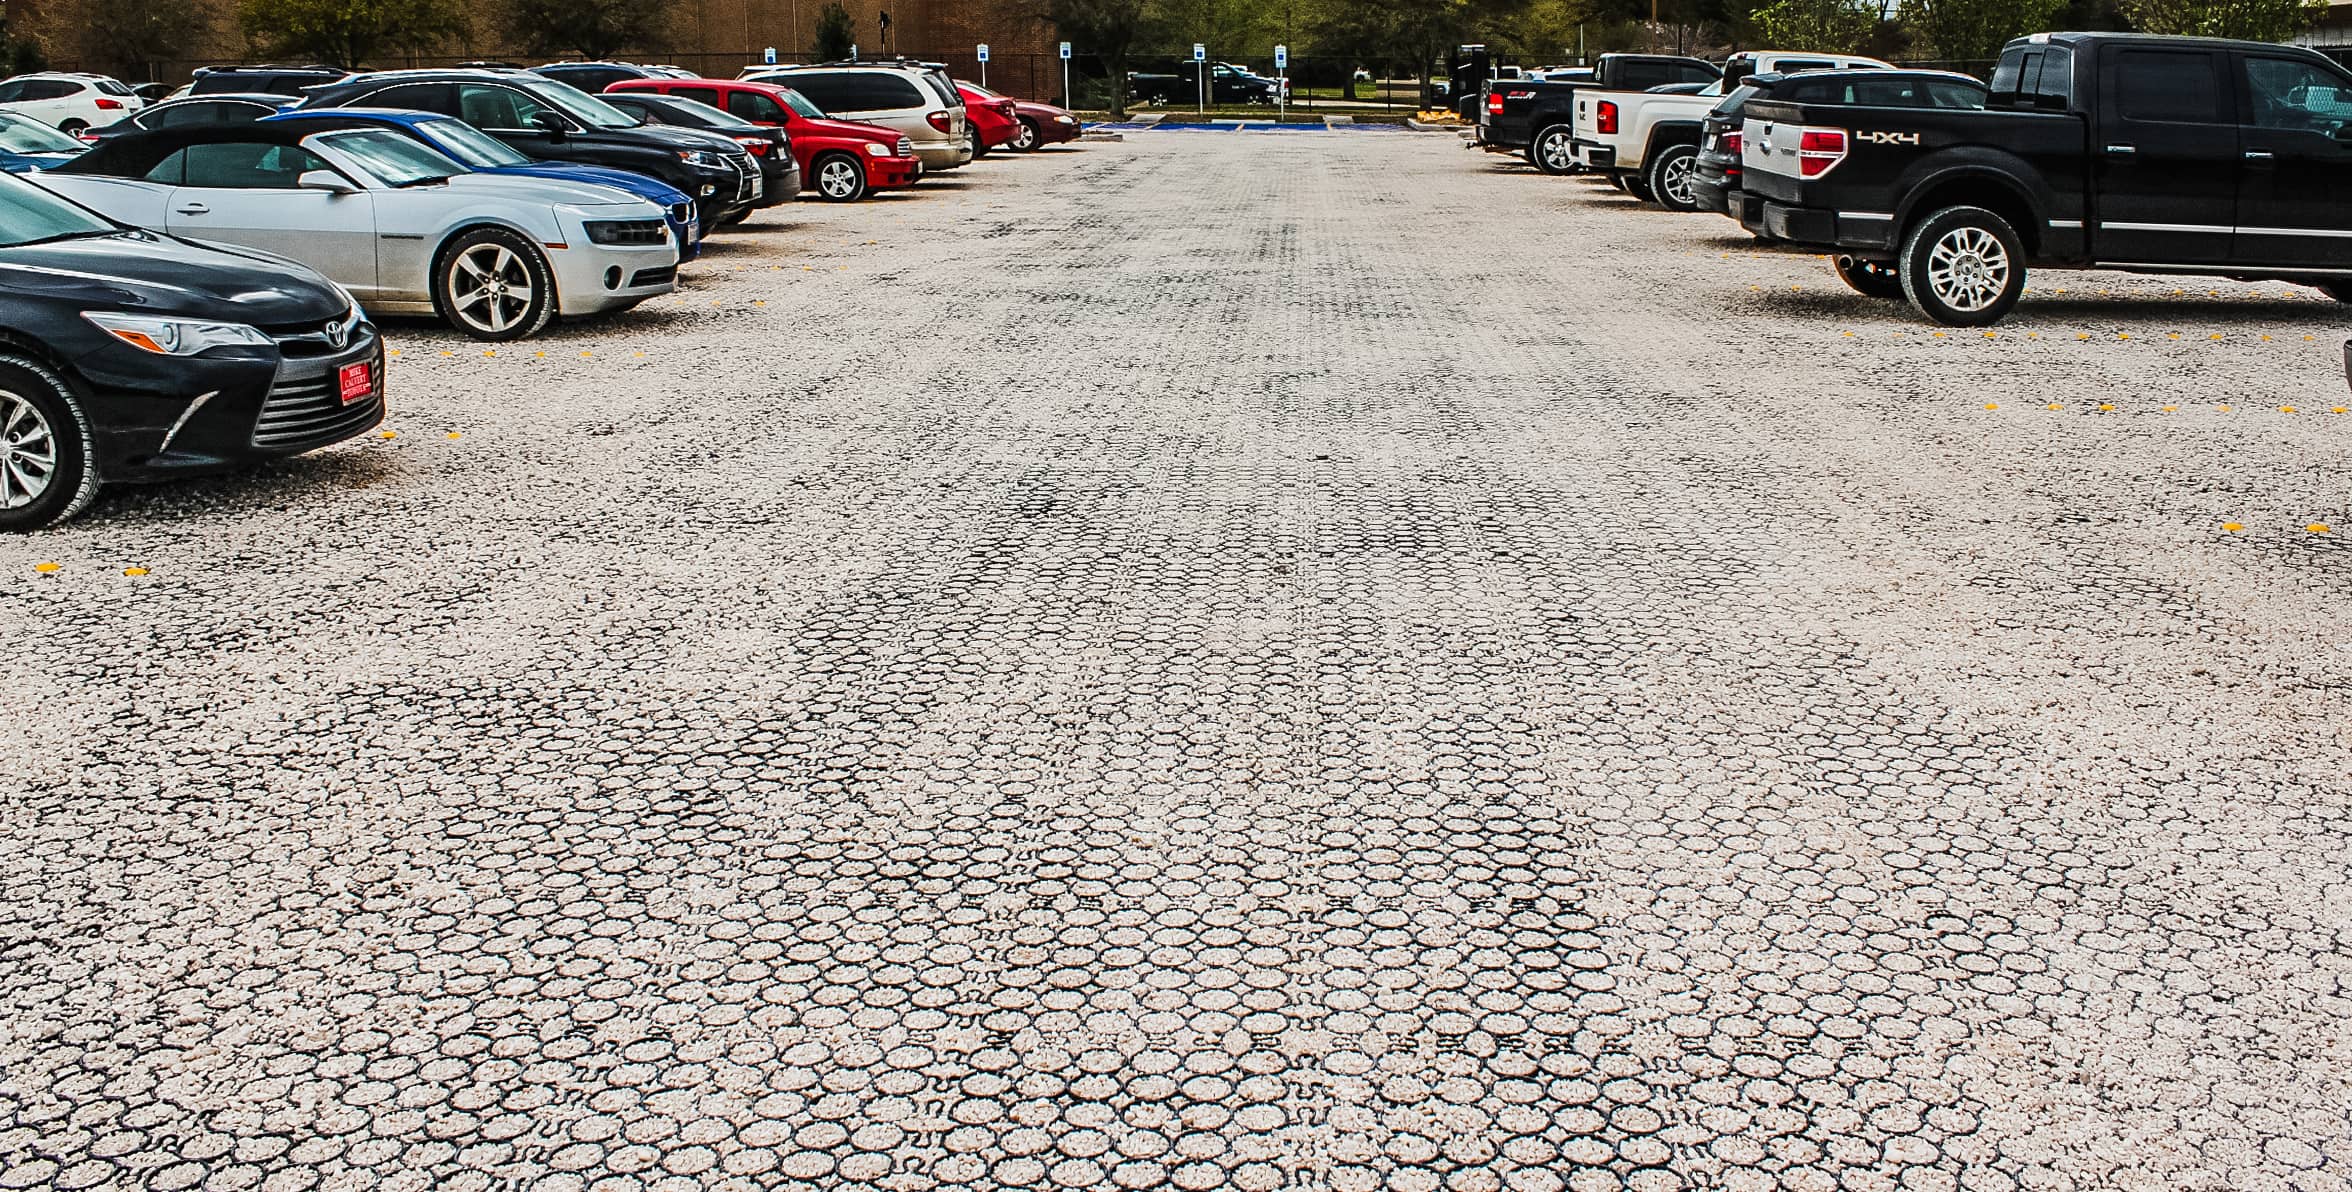
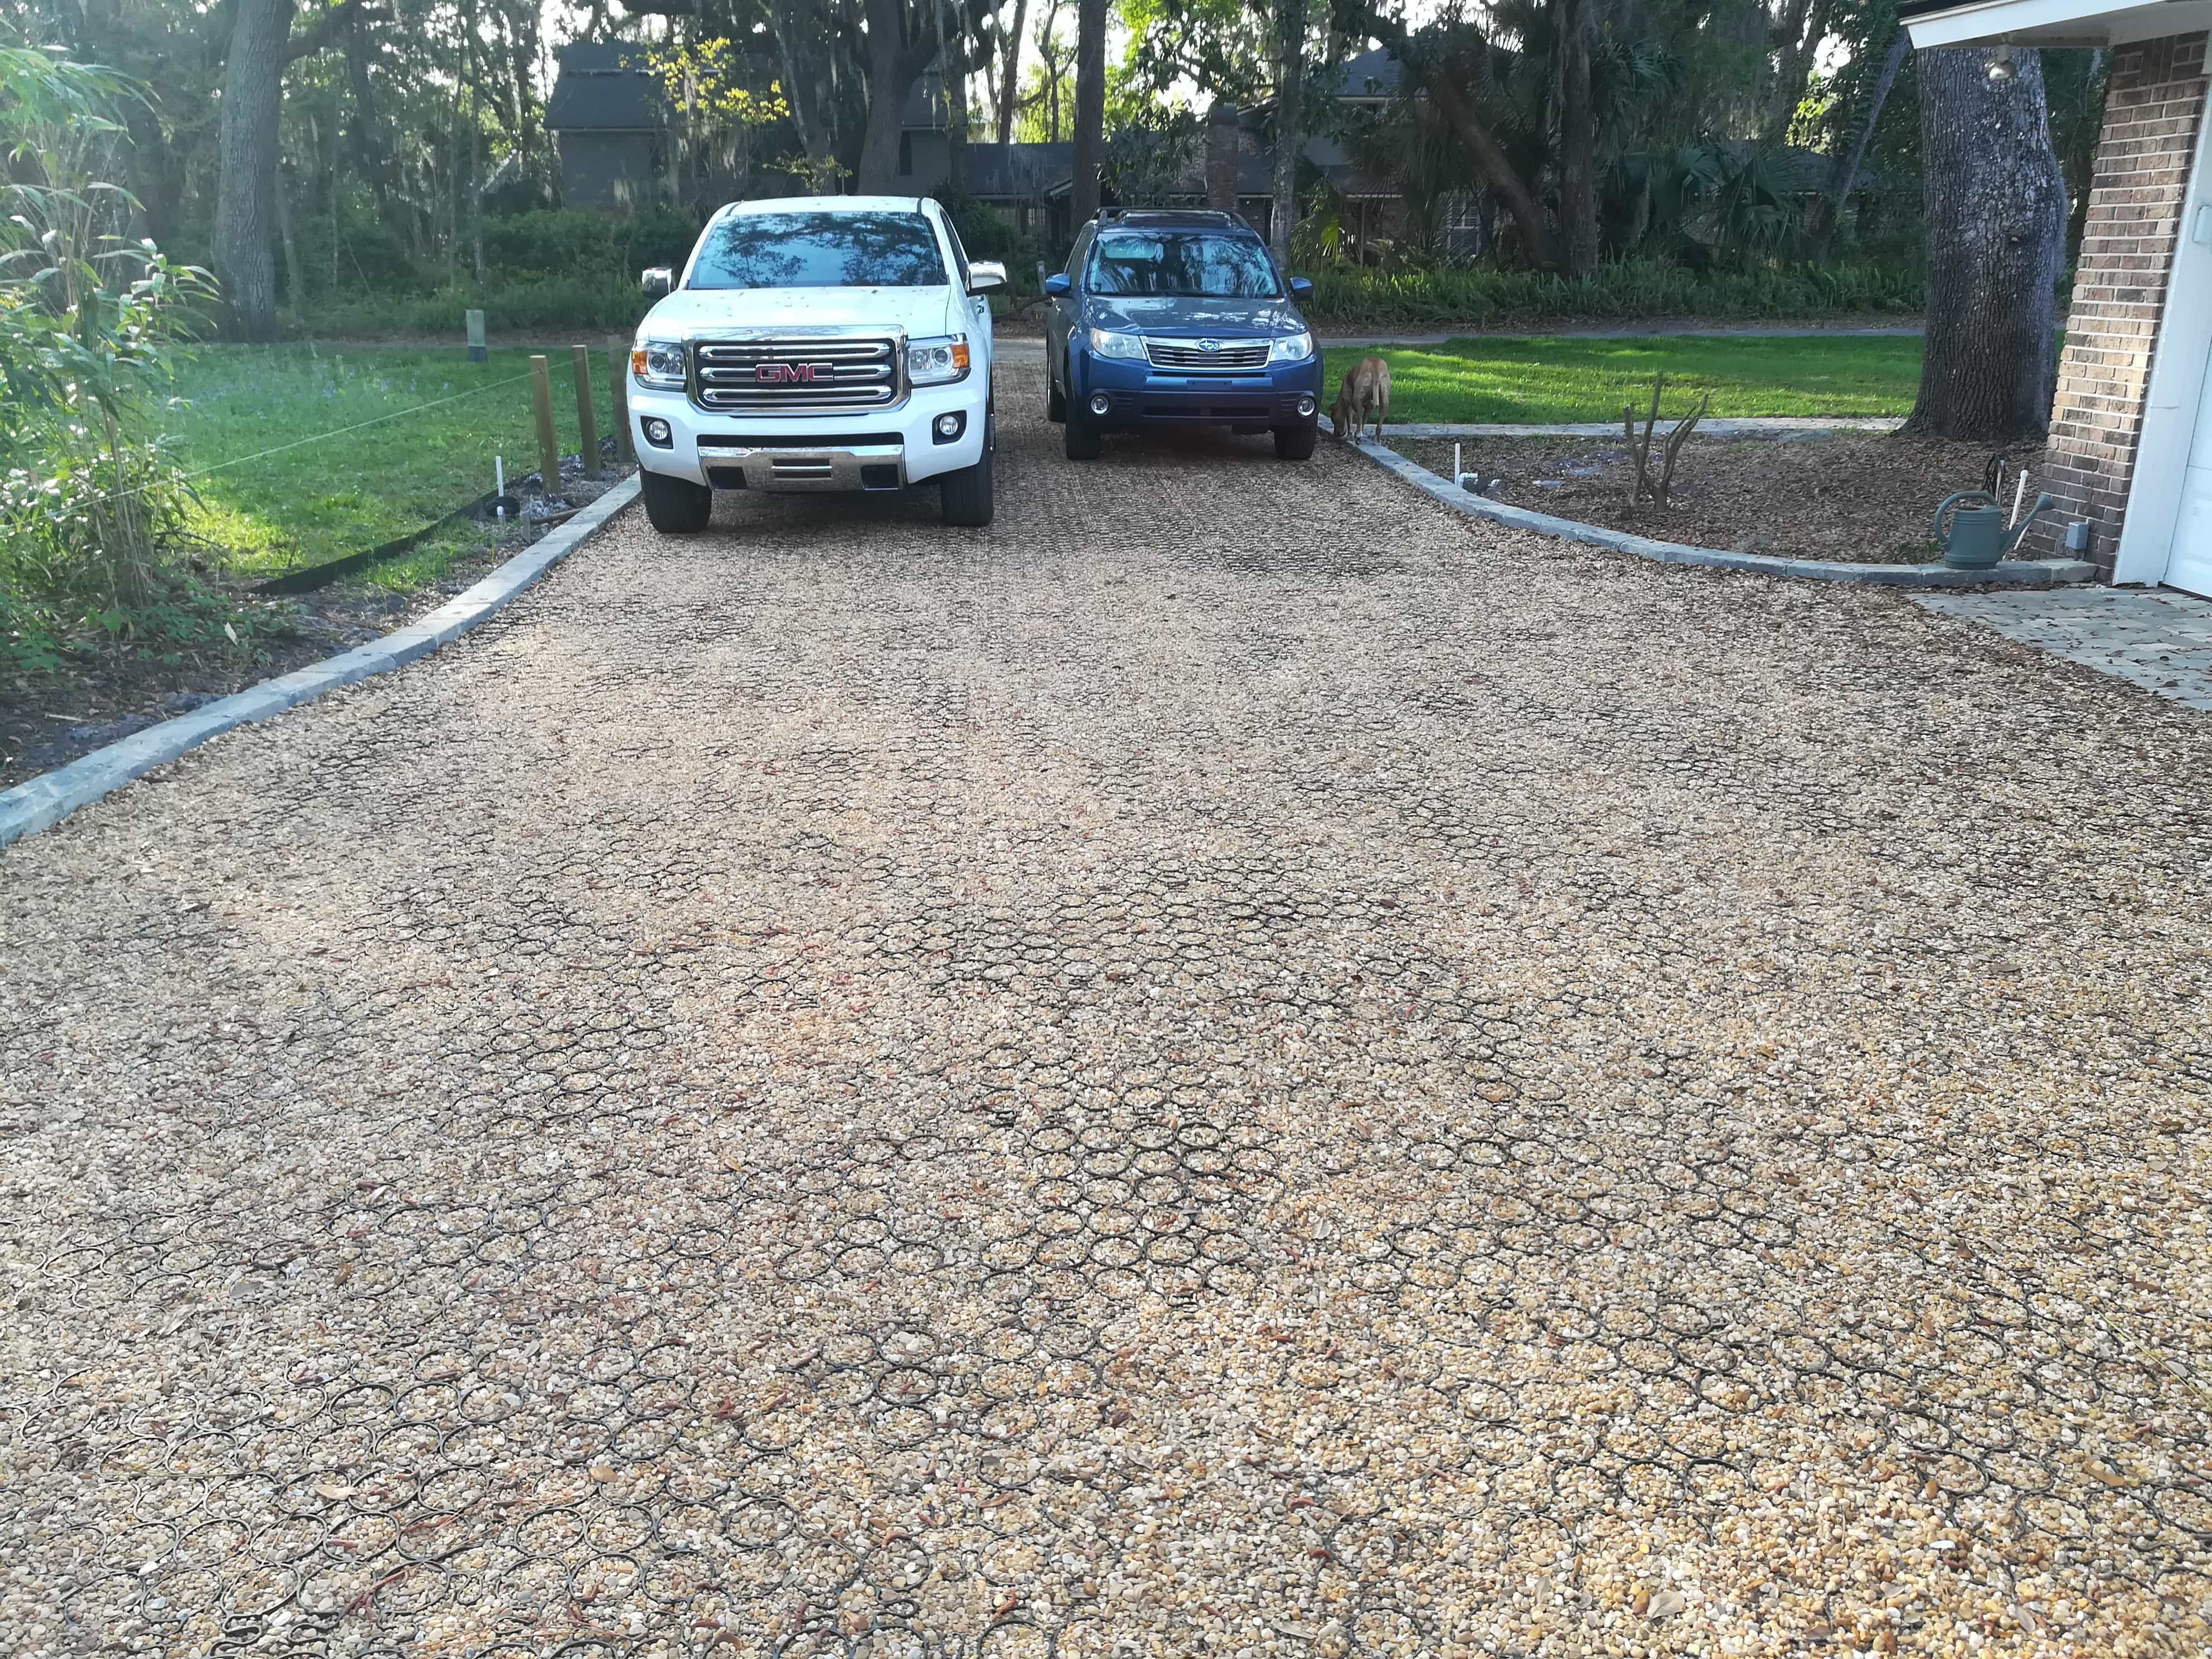
Pros: Permeable Pavers – (interlocking plastic grids) make the process behind your do it yourself driveway easy like Legos. The install can be done by anyone, which leaves the choice of using a contractor up to you. These grids interlock and can be filled with grass or gravel, which stabilizes the soil and allows water to soak back into the ground to recharge groundwater and filter out pollutants.
Cons: Not all permeable pavers are created equal. Choosing a permeable paver built to withstand high traffic and made from durable high quality materials will ensure a maintenance free parking surface. TRUEGRID Paver manufactures the World’s Strongest Permeable Pavers and is built to handle heavy loads.
DIY Asphalt Driveway
Pros: The material handles freeze-thaw weather cycles better than most and due to being black, it retains heat and melts snow quickly. It is typically cheaper than concrete and if taken good care of it can last 12 – 35 years.
Cons: Asphalt, however, requires maintenance such as sealing every 3 – 5 years and cleaning two times a year. You are also limited on style and color with asphalt, which can be damaged in extreme heat. Same as concrete, the addition of impermeable surfaces disallows water to soak back into ground.
DIY Interlocking Concrete Paver or Brick Permeable Paver Driveway
Pros: It has low long-term maintenance requirements and adds aesthetic patterns and colors to your pavement for your front yard. Maintenance costs should be modest if installed correctly and the material should last a long time.
Cons: Usually more expensive than other options and installation is costly and extremely time-consuming. Most can be permeable but over time sediment fills in and can take away permeability.
DIY Grass Driveway
Pros: Grass driveways are typically made from plastic grid systems that allow grass to grow through while adding a stabilized ground for any vehicle to drive or park on. These are great for overflow parking or if you want to keep the greenery around your home for aesthetics.
DIY Hybrid Paver Driveways
Pros: These driveways are a hybrid of two different types of pavement but they all consist of two stripes that are thick enough for a tire to drive over. The most popular combination is typically with grass pavement and any other impermeable pavement such as concrete. These types of driveways are perfect for homes who have tricky street access with little to no visibility of incoming traffic. Having a circular driveway allows you to turn your vehicle around to face the street and exit the driveway safely. This is the most common type of driveway and it is straightforward but you can still take advantage of its width to allow more parking area. To fit the grid in organically-shaped areas, outline trim marks on the plastic paver to cut with a reciprocating saw and attach it to the rest of the grid.
Installation
Once the grid is completely connected and laid down, fill in the hollow space of the grid with gravel and smooth it out with a rake or push broom. Take note that angular ¾ inch gravel is the best for no gravel migration.
After you’ve completed all the previous steps, you can now tamper down your gravel across the grid. This top layer can be customized to whatever color gravel you prefer.
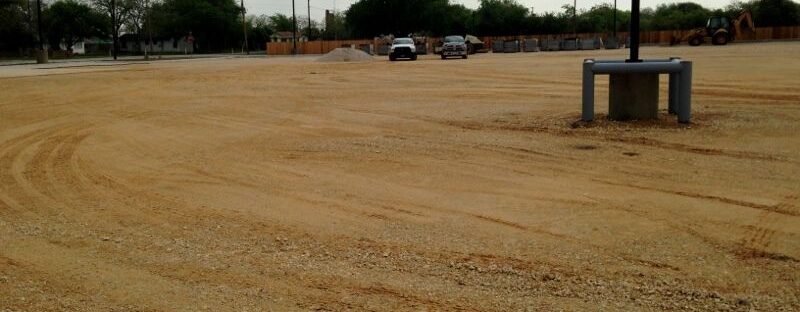
Start from the bottom of your driveway and start placing the grid about an inch below street level. Cover the entire area with the grid and snap the pieces together. Do not cut pieces to fit into odd shapes until the grid is completely laid down. Here is when we start creating the sub-base. Depending on your expected load and drainage needs, lay down 3 – 6 inches of ¾ inch crushed stone, preferably pervious stone such as limestone or granite. Compact this layer with your tamper for a solid foundation. This will be the foundation and the most important step in the process. A solidly flat foundation guarantees a sturdy grid system with no floating sections.
Ensure your location is safe to dig in. Call a utility locating service.
From street grade level, start digging down about 6 inches in your outlined area, depending on expected load and drainage needs. For drainage needs, spend some time figuring out the slope of your ground and how much detention area you want underneath the grass paver system. Consider the fact that a shorter sub-base means less detention area to hold water.
Flatten down the soil with a tamper to ensure stability. Make sure it is leveled and flat.